Exporting Your Game
Exporting, sometimes called bundling, your game is an important step throughout the development process.
Games can exported in two different ways, through the editor, and through the gccl tool. This article will explain how to use the editor to export your game. If you're interested in using the command line tool, please visit this page instead.
Requirements
In order to export a game, you first need to have the game code already compiled into a .wasm file. This step is unique to each programming language, so check your own documentation on how to do this first. Once you have the .wasm file ready, it's time to start the export!
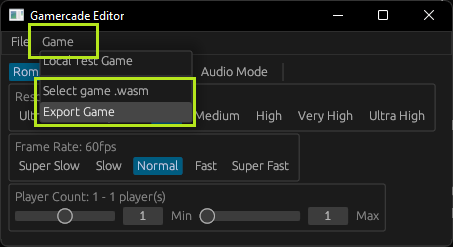
The first step, is to open the Gamercade Editor. Then you should click on "Game" from the top menu, and select the "Export Game" option, like the example below
You will now be prompted to Load .wasm file. Use this file picker dialog to locate the game .wasm file that you previously prepared before this step. Locate the file, and click the Open button. This will also temporarily remember the .wasm file's path in memory to allow re-exporting again faster.
You will now be presented with another file picker prompt, this time to Export Game .gcrom. Select the location and file name for the exported game, and click save. Your .gcrom is now ready to be played!
Re-Exporting
Whenever you select a .wasm file through the "Export Game" or "Select game .wasm" menu options, the Editor will remember this file's path temporarily. This means that the next time you try to export, it will use the same .wasm file each time. If you want to change game code, such as accidentially selecting the wrong file, or wanting to export a different game, simply press the "Select game .wasm" option from the menu. This will now set the editor to use the newest file for future exports.