Instrument Editor
The Instrument Editor lets you create all of the different sound generation sources for your game. This isn't limited to actual real world instruments, instead, its a way of generating the waves which we perceive as sound. Each of the instruments has is own parameters and ways of producing sound. This page covers some of the shared properties of each kind of instrument.
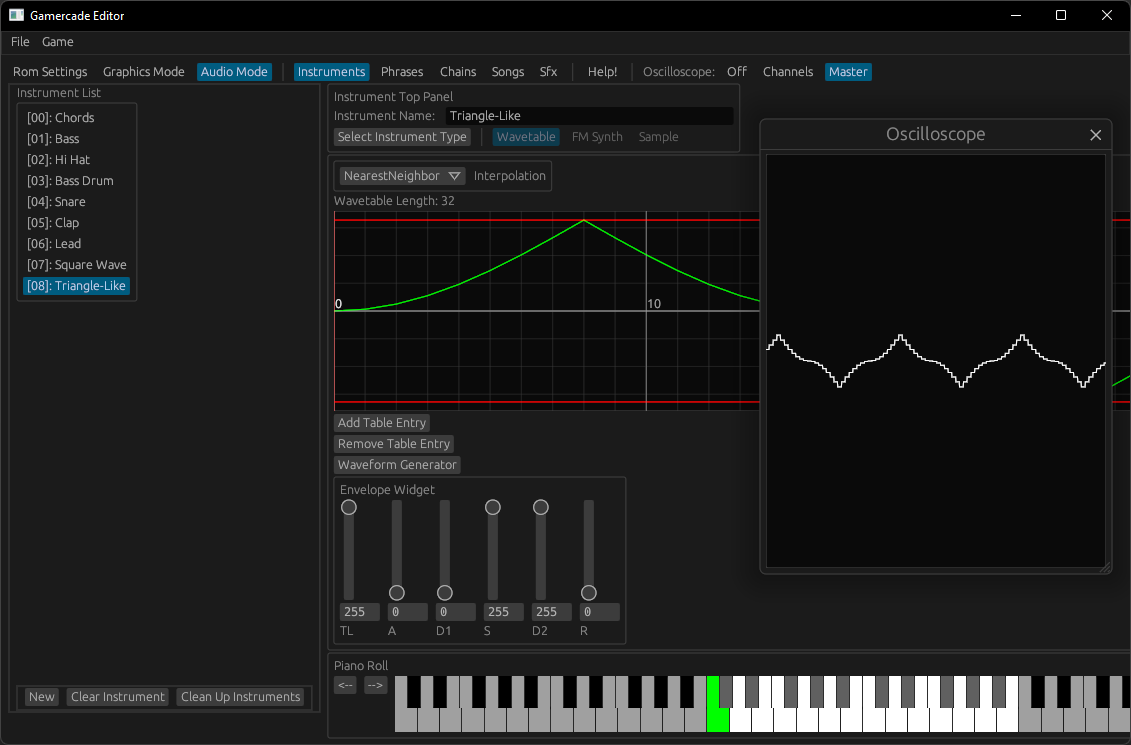
Instrument List
The Instrument List shows all of the currently created instruments. Clicking on an instrument will select it, and will also change the main editor panel to that instrument's kind. The hexadecimal index of each instrument is also listed next to its name. This is useful when working with the tracker.
- Press the New button to add a new instrument to the end of the list.
- Press the Clear Instrument button to reset the currently selected instrument back to zero.
- Press the Clean Up Instruments button to delete any unused instruments, after the last used index. This feature is not yet implemented
Instrument Top Panel
The Instrument Top Panel lets you edit general information about the instrument, such as the name or type of the instrument. Be careful when changing the type of instrument, as it can lead to a loss of data!
Interpolation Mode
In order to preserve space, the instruments will interpolate between values on the lookup table for sound generation. This allows the sound engine to produce a much cleaner sound with less overall space usage, at the cost of some extra calculations. However, some sounds might benefit from more harsh interpolation methods, so the instrument editor exposes three different ways:
- Linear - The default value. Takes values between two points, and calculates the middle between them. Produces a smooth, clean sound.
- Nearest Neighbor - Rounds the number to the nearest whole integer. For example,
1.2will round to1, and2.5will round to3. Produces a harsher sound. - Truncate - Truncates the number, removing any fractional component. For example,
1.2will become1, and2.5will become2. Produces a harsher sound.
Envelope
An envelope controls how a sound will change over time. There are multiple phases in the envelope. Generally, the sound will travel across the envelope from no sound, to attack, decay 1, hold on sustain and decay 2 until the key is released. Then it will decay back to no sound.
- Total Level - Displayed as
TLon the widget. Represents the full volume of this sound source. - Attack Time - Displayed as
Aon the widget. Represents how long it takes to reach Total Level. - Decay 1 Time - Displayed as
D1on the widget. Represents how long it takes to travel from Total Level to Sustain Level. - Sustain Level - Displayed as
Son the widget. Represents the sustained volume of this sound source, when a key is held. - Decay 2 Time - Displayed as
D2on the widget. Represents how long it takes for this sound to decay while holding the key. - Release Time - Displayed as
Ron the widget. Represents how long it takes for this sound to decay while the key is released.
These numbers can range from 0 to 255. Note that this is an exponential scale.
Piano Roll
Your computer keyboard can act like a piano! The piano roll temporary uses the 8 sfx channels to play single notes interactively. This means you can play up to 8 notes at a time.
- Click on a key to play that note. This is the same way that the tracker will produce sound.
- Left & Right Arrow Keys to shift the keyboard an entire octave in that direction.
- Keys
ZtoMplay white keys on the bottom octave, with keysStoJfor the black keys. - Keys
QtoUplay the white keys on the higher octave, with keys2to7for the black keys.
📄️ Wavetable
Wavetable
📄️ FM Synth
FM Synth
📄️ Sampler
Sampler